Spring Boot 1.4.1 - Controller
Controller
Thymeleaf については次のリンクを参照してください。
http://www.thymeleaf.org/doc/tutorials/2.1/usingthymeleaf_ja.html
Thymeleaf を Spring Boot で使えるようにするために、build.gradle の dependencies に次の行を追加します。
compile('org.springframework.boot:spring-boot-starter-thymeleaf')
1. Index
PROJECT_ROOT/src/main/resources/templates/index.html を作成します。
<html xmlns="http://www.w3.org/1999/xhtml"
      xmlns:th="http://www.thymeleaf.org">
  <head>
    <meta charset="UTF-8"/>
    <title th:text="#{title}">TITLE</title>
    <meta http-equiv="Content-Type" content="text/html; charset=UTF-8" />
  </head>
  <body>
    <p th:text="#{welcome}">WELCOME</p>
  </body>
</html>
PROJECT_ROOT/src/main/resources/messages.properties を作成します。
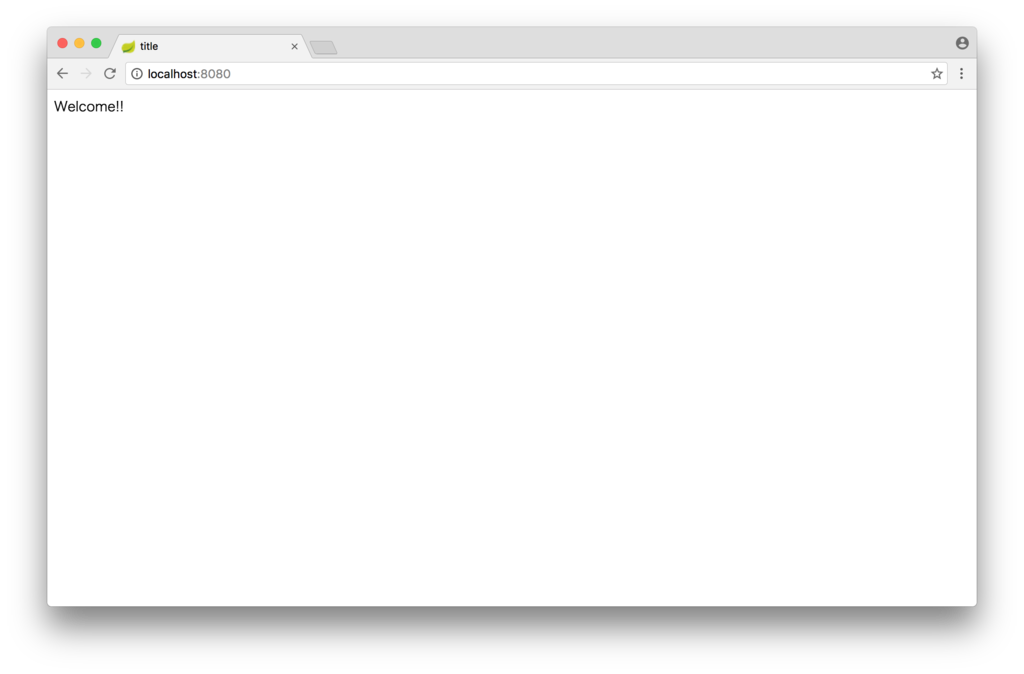
title=title
welcome=Welcome!!
コントローラを作成します。
package com.example;

import org.springframework.stereotype.Controller;
import org.springframework.web.bind.annotation.GetMapping;

@Controller
public class IndexController {

    @GetMapping("/")
    public String index() {
        return "index";
    }

}
コントローラのメソッドが返す文字列に .html を付加した templates ディレクトリにあるファイルを Thymeleaf のテンプレートとして使用して、HTML をブラウザに返します。
./gradlew bootRun
で起動して、ブラウザで http://localhost:8080 にアクセスした画面は下のようになります。

2. ロケール
デフォルトでは、org.springframework.web.servlet.i18n.AcceptHeaderLocaleResolver を使用して、ブラウザから送られる accept-language を使用したロケールでメッセージが表示されます。
org.springframework.web.servlet.i18n.CookieLocaleResolver, org.springframework.web.servlet.i18n.SessionLocaleResolver, org.springframework.web.servlet.i18n.FixedLocaleResolver を使用した、クッキー、セッション、固定といったあらかじめ用意された LocaleResolver を使用することもできます。
ここでは独自の LocaleResolver を作成して日本語(osaka_JP)になるようにしてみます。
package com.example;

import org.springframework.web.servlet.LocaleResolver;

import javax.servlet.http.HttpServletRequest;
import javax.servlet.http.HttpServletResponse;
import java.util.Locale;

public class OsakaLocaleResolver implements LocaleResolver {

    @Override
    public Locale resolveLocale(HttpServletRequest request) {
        return new Locale("osaka", "JP");
    }

    @Override
    public void setLocale(HttpServletRequest request,
            HttpServletResponse response,
            Locale locale) {
        throw new UnsupportedOperationException("unsupported");
    }
}
package com.example;

import org.springframework.boot.SpringApplication;
import org.springframework.boot.autoconfigure.SpringBootApplication;
import org.springframework.context.annotation.Bean;

@SpringBootApplication
public class DemoApplication {

    public static void main(String[] args) {
        SpringApplication.run(DemoApplication.class, args);
    }

    @Bean
    OsakaLocaleResolver localeResolver() {
        return new OsakaLocaleResolver();
    }
}
PROJECT_ROOT/src/main/resources/messages_osaka.properties を作成します。
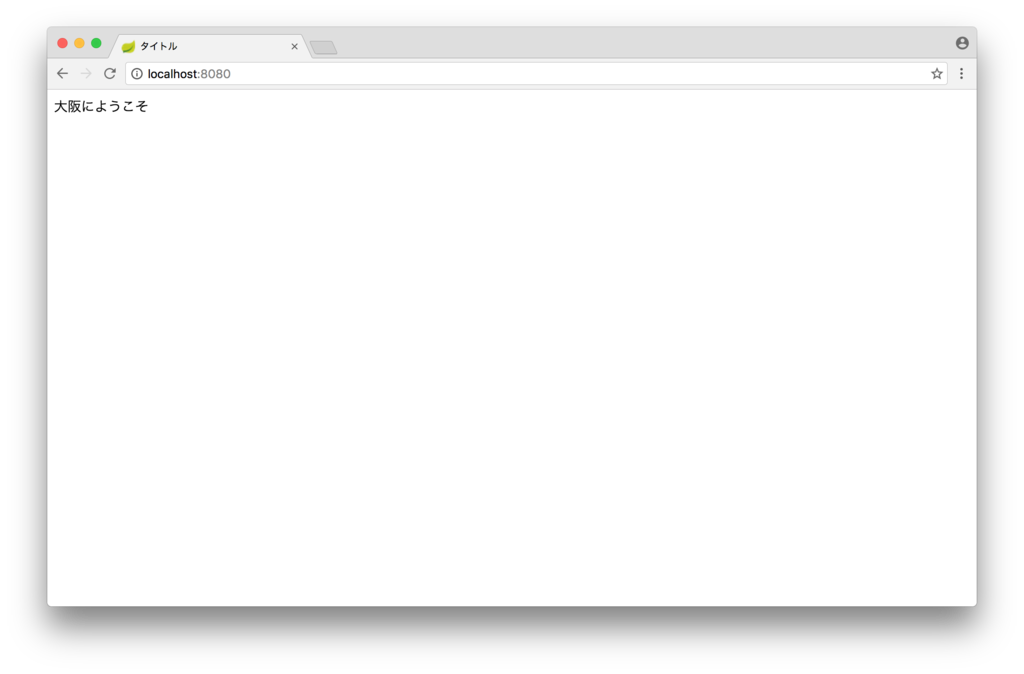
title=タイトル
welcome=大阪にようこそ
実行して、http://localhost:8080 にアクセスしてみます。
./gradlew bootRun

Spring Boot 1.4.1 - RestController
1. Hello World
コントローラクラスを作成します。
最初にテストを記述します。
package com.example;

import org.junit.Test;
import org.junit.runner.RunWith;
import org.springframework.beans.factory.annotation.Autowired;
import org.springframework.boot.test.context.SpringBootTest;
import org.springframework.boot.test.web.client.TestRestTemplate;
import org.springframework.http.HttpStatus;
import org.springframework.http.ResponseEntity;
import org.springframework.test.context.junit4.SpringRunner;

import static org.hamcrest.CoreMatchers.is;
import static org.junit.Assert.assertThat;

@RunWith(SpringRunner.class)
@SpringBootTest(webEnvironment = SpringBootTest.WebEnvironment.RANDOM_PORT)
public class DemoApplicationTests {

    @Autowired
    TestRestTemplate template;

    @Test
    public void contextLoads() {
        ResponseEntity<String> res = template.getForEntity("/", String.class);
        assertThat(res.getStatusCode(), is(HttpStatus.OK));
        assertThat(res.getBody(), is("Hello World!!"));
    }

}
次に、IndexControllerを作成します。
package com.example;

import org.springframework.web.bind.annotation.GetMapping;
import org.springframework.web.bind.annotation.RestController;

@RestController
public class IndexController {

    @GetMapping("/")
    public String index() {
        return "Hello World!!";
    }
}
REST のコントローラには、@RestController アノテーションを使ってクラスを作成します。 コントローラのメソッドには URL のマッピングを設定します。 ここで使用している GetMapping 以外に、PostMapping や、PutMpping、DeleteMapping 等があります。
最初のステップでは、Hello World!! という文字列を返しました。
2. コントローラのメソッドの引数
コントローラのメソッドは、HttpServletRequest や HttpServletResponse やその他さまざまなオブジェクトを受け取ることができます。
package com.example;

import org.springframework.web.bind.annotation.GetMapping;
import org.springframework.web.bind.annotation.RestController;

import javax.servlet.http.HttpServletRequest;
import javax.servlet.http.HttpServletResponse;
import java.util.Objects;

@RestController
public class IndexController {

    @GetMapping("/")
    public String index(HttpServletRequest req, HttpServletResponse res) {
        Objects.nonNull(req);
        Objects.nonNull(res);
        return "Hello World!!";
    }
}
3. PathVariable
URLパスの変数の値を受け取ることができます。
package com.example;

import org.springframework.web.bind.annotation.GetMapping;
import org.springframework.web.bind.annotation.PathVariable;
import org.springframework.web.bind.annotation.RestController;

@RestController
public class IndexController {

    @GetMapping("/{id}")
    public String index(@PathVariable String id) {
        return "ID: " + id;
    }
}
package com.example;

import org.junit.Test;
import org.junit.runner.RunWith;
import org.springframework.beans.factory.annotation.Autowired;
import org.springframework.boot.test.context.SpringBootTest;
import org.springframework.boot.test.web.client.TestRestTemplate;
import org.springframework.http.HttpStatus;
import org.springframework.http.ResponseEntity;
import org.springframework.test.context.junit4.SpringRunner;

import static org.hamcrest.CoreMatchers.is;
import static org.junit.Assert.assertThat;

@RunWith(SpringRunner.class)
@SpringBootTest(webEnvironment = SpringBootTest.WebEnvironment.RANDOM_PORT)
public class DemoApplicationTests {

    @Autowired
    TestRestTemplate template;

    @Test
    public void contextLoads() {
        ResponseEntity<String> res = template.getForEntity("/123", String.class);
        assertThat(res.getStatusCode(), is(HttpStatus.OK));
        assertThat(res.getBody(), is("ID: 123"));
    }

}
4. Request パラメータ
Request パラメータを受け取ることももちろんできます。
package com.example;

import org.springframework.web.bind.annotation.GetMapping;
import org.springframework.web.bind.annotation.RequestParam;
import org.springframework.web.bind.annotation.RestController;

@RestController
public class IndexController {

    @GetMapping("/foo")
    public String index(@RequestParam String id) {
        return "ID: " + id;
    }
}
package com.example;

import org.junit.Test;
import org.junit.runner.RunWith;
import org.springframework.beans.factory.annotation.Autowired;
import org.springframework.boot.test.context.SpringBootTest;
import org.springframework.boot.test.web.client.TestRestTemplate;
import org.springframework.http.HttpStatus;
import org.springframework.http.ResponseEntity;
import org.springframework.test.context.junit4.SpringRunner;

import static org.hamcrest.CoreMatchers.is;
import static org.junit.Assert.assertThat;

@RunWith(SpringRunner.class)
@SpringBootTest(webEnvironment = SpringBootTest.WebEnvironment.RANDOM_PORT)
public class DemoApplicationTests {

    @Autowired
    TestRestTemplate template;

    @Test
    public void contextLoads() {
        ResponseEntity<String> res = template.getForEntity("/foo?id=bar", String.class);
        assertThat(res.getStatusCode(), is(HttpStatus.OK));
        assertThat(res.getBody(), is("ID: bar"));
    }

}
ModelAttribute
Request パラメータが多い場合等は、ModelAttribute を使って、Request パラメータの値が設定されたオブジェクトを受け取ることができるようにすることができます。
package com.example;

public class Foo {

    private String id;

    public void setId(String id) {
        this.id = id;
    }

    public String getId() {
        return id;
    }
}
package com.example;

import org.springframework.web.bind.annotation.GetMapping;
import org.springframework.web.bind.annotation.ModelAttribute;
import org.springframework.web.bind.annotation.RestController;

@RestController
public class IndexController {

    @GetMapping("/foo")
    public String index(@ModelAttribute Foo foo) {
        return "ID: " + foo.getId();
    }
}
package com.example;

import org.junit.Test;
import org.junit.runner.RunWith;
import org.springframework.beans.factory.annotation.Autowired;
import org.springframework.boot.test.context.SpringBootTest;
import org.springframework.boot.test.web.client.TestRestTemplate;
import org.springframework.http.HttpStatus;
import org.springframework.http.ResponseEntity;
import org.springframework.test.context.junit4.SpringRunner;

import static org.hamcrest.CoreMatchers.is;
import static org.junit.Assert.assertThat;

@RunWith(SpringRunner.class)
@SpringBootTest(webEnvironment = SpringBootTest.WebEnvironment.RANDOM_PORT)
public class DemoApplicationTests {

    @Autowired
    TestRestTemplate template;

    @Test
    public void contextLoads() {
        ResponseEntity<String> res = template.getForEntity("/foo?id=bar", String.class);
        assertThat(res.getStatusCode(), is(HttpStatus.OK));
        assertThat(res.getBody(), is("ID: bar"));
    }

}
5. HandlerMethodArgumentResolver
HandlerMethodArgumentResolver の実装クラスを作成して、任意のオブジェクトをコントローラのメソッドで受け取ることができるようにすることができます。 Spring Security を使ってログインしているユーザの Principal をコントローラで受け取る場合などこの仕組みが多く使用されています。
package com.example;

public class Foo {

    public final String foo = "foo";

}
package com.example;

import org.springframework.core.MethodParameter;
import org.springframework.web.bind.support.WebDataBinderFactory;
import org.springframework.web.context.request.NativeWebRequest;
import org.springframework.web.method.support.HandlerMethodArgumentResolver;
import org.springframework.web.method.support.ModelAndViewContainer;

public class FooHandlerMethodArgumentResolver implements HandlerMethodArgumentResolver {

    @Override
    public boolean supportsParameter(MethodParameter parameter) {
        return Foo.class.isAssignableFrom(parameter.getParameterType());
    }

    @Override
    public Object resolveArgument(MethodParameter parameter,
                                  ModelAndViewContainer mavContainer,
                                  NativeWebRequest webRequest,
                                  WebDataBinderFactory binderFactory)
            throws Exception {
        return new Foo();
    }
}
package com.example;

import org.springframework.boot.SpringApplication;
import org.springframework.boot.autoconfigure.SpringBootApplication;
import org.springframework.web.method.support.HandlerMethodArgumentResolver;
import org.springframework.web.servlet.config.annotation.WebMvcConfigurerAdapter;

import java.util.List;

@SpringBootApplication
public class DemoApplication extends WebMvcConfigurerAdapter {

    @Override
    public void addArgumentResolvers(
            List<HandlerMethodArgumentResolver> argumentResolvers) {
        argumentResolvers.add(new FooHandlerMethodArgumentResolver());
    }

    public static void main(String[] args) {
        SpringApplication.run(DemoApplication.class, args);
    }
}
package com.example;

import org.springframework.web.bind.annotation.GetMapping;
import org.springframework.web.bind.annotation.RestController;

@RestController
public class IndexController {

    @GetMapping("/")
    public String index(Foo foo) {
        return foo.foo;
    }
}
package com.example;

import org.junit.Test;
import org.junit.runner.RunWith;
import org.springframework.beans.factory.annotation.Autowired;
import org.springframework.boot.test.context.SpringBootTest;
import org.springframework.boot.test.web.client.TestRestTemplate;
import org.springframework.http.HttpStatus;
import org.springframework.http.ResponseEntity;
import org.springframework.test.context.junit4.SpringRunner;

import static org.hamcrest.CoreMatchers.is;
import static org.junit.Assert.assertThat;

@RunWith(SpringRunner.class)
@SpringBootTest(webEnvironment = SpringBootTest.WebEnvironment.RANDOM_PORT)
public class DemoApplicationTests {

    @Autowired
    TestRestTemplate template;

    @Test
    public void contextLoads() {
        ResponseEntity<String> res = template.getForEntity("/", String.class);
        assertThat(res.getStatusCode(), is(HttpStatus.OK));
        assertThat(res.getBody(), is("foo"));
    }

}
macOS Sierraにawscliインストールしてみる
pipのインストール
pip installationで、get-pip.pyをダウンロードします。
sudo python get-pip.py
AWS CLIをインストール
sudo pip install awscli --upgrade --ignore-installed six
AWS Access Key IDとAWS Secret Access Keyの取得
IAMでユーザを作成して、AWS Access Key IDとAWS Secret Access Keyの取得
リージョンを調べる
awsコマンドの初期設定
aws configure
AWS Access Key ID [None]: xxx
AWS Secret Access Key [None]: xxx
Default region name [None]: ap-northeast-1
Default output format [None]:
設定した内容の確認
cat .aws/config
cat .aws/credentials
VPCでsubnet-idを調べる
EC2ダッシュボードで、キーペアを作成(MyKeyPair)
インスタンスの作成
とりあえず、デフォルトVPCで作成
# RDS
aws rds create-db-instance \
  --db-instance-identifier testdb \
  --db-instance-class db.t2.micro \
  --engine mysql \
  --engine-version 5.7.11 \
  --master-username dbuser \
  --master-user-password password \
  --allocated-storage 5

# AP
aws ec2 run-instances \
  --image-id ami-831fcde2 \
  --count 1 \
  --instance-type t2.micro \
  --key-name MyKeyPair \
  --security-group-ids sg-xxx \
  --subnet-id subnet-xxx
aws ec2 run-instances \
  --image-id ami-831fcde2 \
  --count 1 \
  --instance-type t2.micro \
  --key-name MyKeyPair \
  --security-group-ids sg-xxx \
  --subnet-id subnet-xxx
TypeScriptはじめました
GitHubリポジトリ
動かし方
npm install
npm start
動くようになるまでにしたこと
初期化
npm init
typings init
最初にcrypto-jsとその型定義
npm install crypto-js --save
typings install dt~cryptojs --save --global
tsconfig.jsonを記述
{
    "compilerOptions": {
        "target": "es5",
        "module": "commonjs",
        "moduleResolution": "node",
        "removeComments": false
    },
    "files": [
        "typings/index.d.ts"
    ]
}
app/main.tsを書く前に
これだけだと、requireファンクションを使うことができなかった。 Angular2のtypings.jsonをみて、少し追加。
typings install dt~node --save --global
これで、requireが使えるようになる。 だけど、とりあえず、Angular2を参考にcore-jsとjasmineも追加しておくことにした。
typings install dt~core-js --save --global
typings install dt~jasmine --save --global
app/main.tsを書く
Visual Studio Codeを使ってさくさくっと記述。型があるのは補完とかがきいて便利。
Seleniumメモ
Azure IoT HubのMQTT(s)
環境
MQTTに接続するユーザ名とパスワード
ユーザ名
{iothubhostname}/{device_id}
パスワード
SharedAccessSignature sig={signature-string}&se={expiry}&sr={URL-encoded-resourceURI}
String password = String.format(
    "SharedAccessSignature sig=%s&se=%s&sr=%s",
    URLEncoder.encode(sig, StandardCharsets.UTF_8.name()),
    expiry,
    scope);
expiry
有効期限でUNIXタイムスタンプ(秒)のlong値です
URL-encoded-resourceURI(scope)
{iothubhostname}/devices/{device_id}
signature-string(sig)
デバイスのキーをBase64でデコードしたバイナリをHMAC-SHA256のキーとして使用します。
String deviceKey = properties.getDeviceKey();

Mac mac = Mac.getInstance("HmacSHA256");
mac.init(new SecretKeySpec(Base64.getMimeDecoder().decode(deviceKey),
    "HmacSHA256"));
URL-encoded-resourceURIとexpiryを改行で分けたメッセージを署名します
String scope = String.format("%s/devices/%s",
    properties.getHostname(),
    URLEncoder.encode(properties.getDeviceId(), StandardCharsets.UTF_8.name()));
String message = String.format("%s\n%s", scope, expiry);
String sig = Base64.getMimeEncoder().encodeToString(mac.doFinal(message.getBytes()));
IoT Hubへのメッセージの送信
devices/{device_id}/messages/events/ または devices/{device_id}/messages/events/{property_bag} をトピック名としてメッセージを送信できます。
IoT Hubからのメッセージの受信
devices/{device_id}/messages/devicebound/# をトピックフィルターとして使用してサブスクライブできます。
![Spring徹底入門 Spring FrameworkによるJavaアプリケーション開発 [ 株式会社NTTデータ ] Spring徹底入門 Spring FrameworkによるJavaアプリケーション開発 [ 株式会社NTTデータ ]](http://thumbnail.image.rakuten.co.jp/@0_mall/book/cabinet/2470/9784798142470.jpg?_ex=128x128)
![はじめてのSpring Boot改訂版 [ 槇俊明 ] はじめてのSpring Boot改訂版 [ 槇俊明 ]](http://thumbnail.image.rakuten.co.jp/@0_mall/book/cabinet/9699/9784777519699.jpg?_ex=128x128)
![Amazon Web Services実践入門 [ 舘岡守 ] Amazon Web Services実践入門 [ 舘岡守 ]](http://thumbnail.image.rakuten.co.jp/@0_mall/book/cabinet/6734/9784774176734.jpg?_ex=128x128)
![Selenium実践入門 [ 伊藤望 ] Selenium実践入門 [ 伊藤望 ]](http://thumbnail.image.rakuten.co.jp/@0_mall/book/cabinet/8943/9784774178943.jpg?_ex=128x128)
![Seleniumデザインパターン & ベストプラクティス [ DimaKovalenko ] Seleniumデザインパターン & ベストプラクティス [ DimaKovalenko ]](http://thumbnail.image.rakuten.co.jp/@0_mall/book/cabinet/7423/9784873117423.jpg?_ex=128x128)
![実践Selenium WebDriver [ サタヤ・アバサララ ] 実践Selenium WebDriver [ サタヤ・アバサララ ]](http://thumbnail.image.rakuten.co.jp/@0_mall/book/cabinet/6952/9784873116952.jpg?_ex=128x128)